This Parker Knoll wing chair came in worn and tired in its original brown mohair velvet, but underneath it was exactly the kind of chair worth saving. A sound hardwood frame, its original sprung seat, and a frame stamp that told its whole story. Here is the full job, start to finish, documented stage by stage — re-covered in a deep teal velvet.
| Piece | Parker Knoll wing chair (model PK 720/745/1013) |
| Category | Furniture |
| Bench hours | 5.5 |
| Fabric | Teal velvet |
| Materials | Original springs (reused), reused foam (steamed), Dacron wrap, velvet, matching piping |
The tools for the job
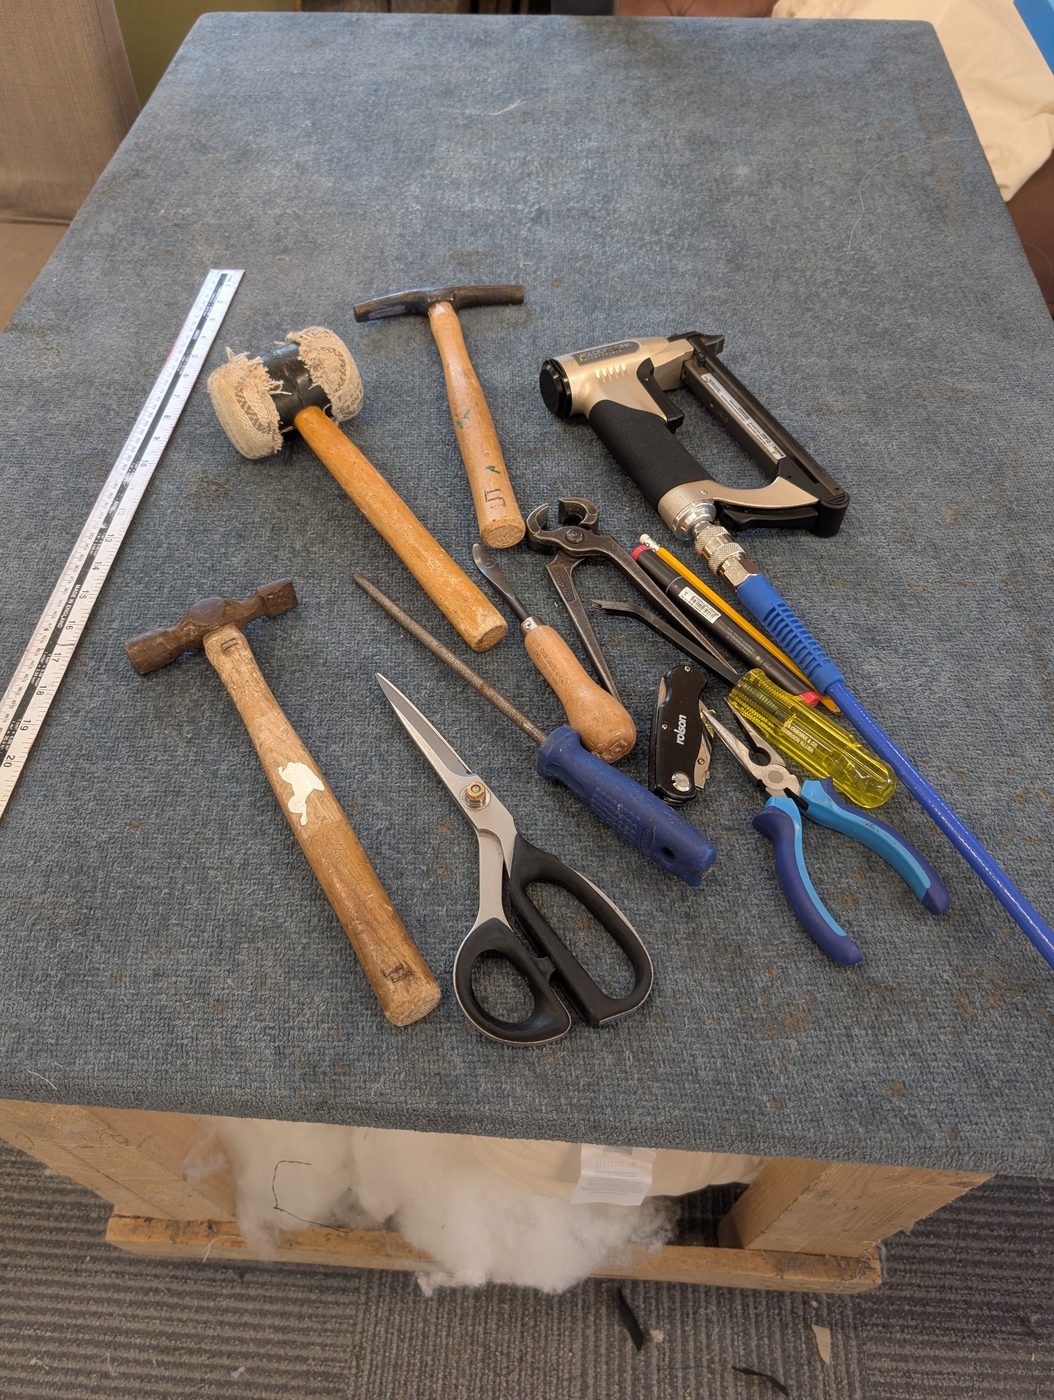
Every job starts with the right tools to hand. A wooden mallet and a magnetic hammer, a staple unpicker and ripping chisel for the strip-down, a regulator, upholstery shears, pincers for pulling staples and tacks, and the staple gun for the new work. Nothing exotic — just the well-worn kit of a working upholsterer.
The fabric
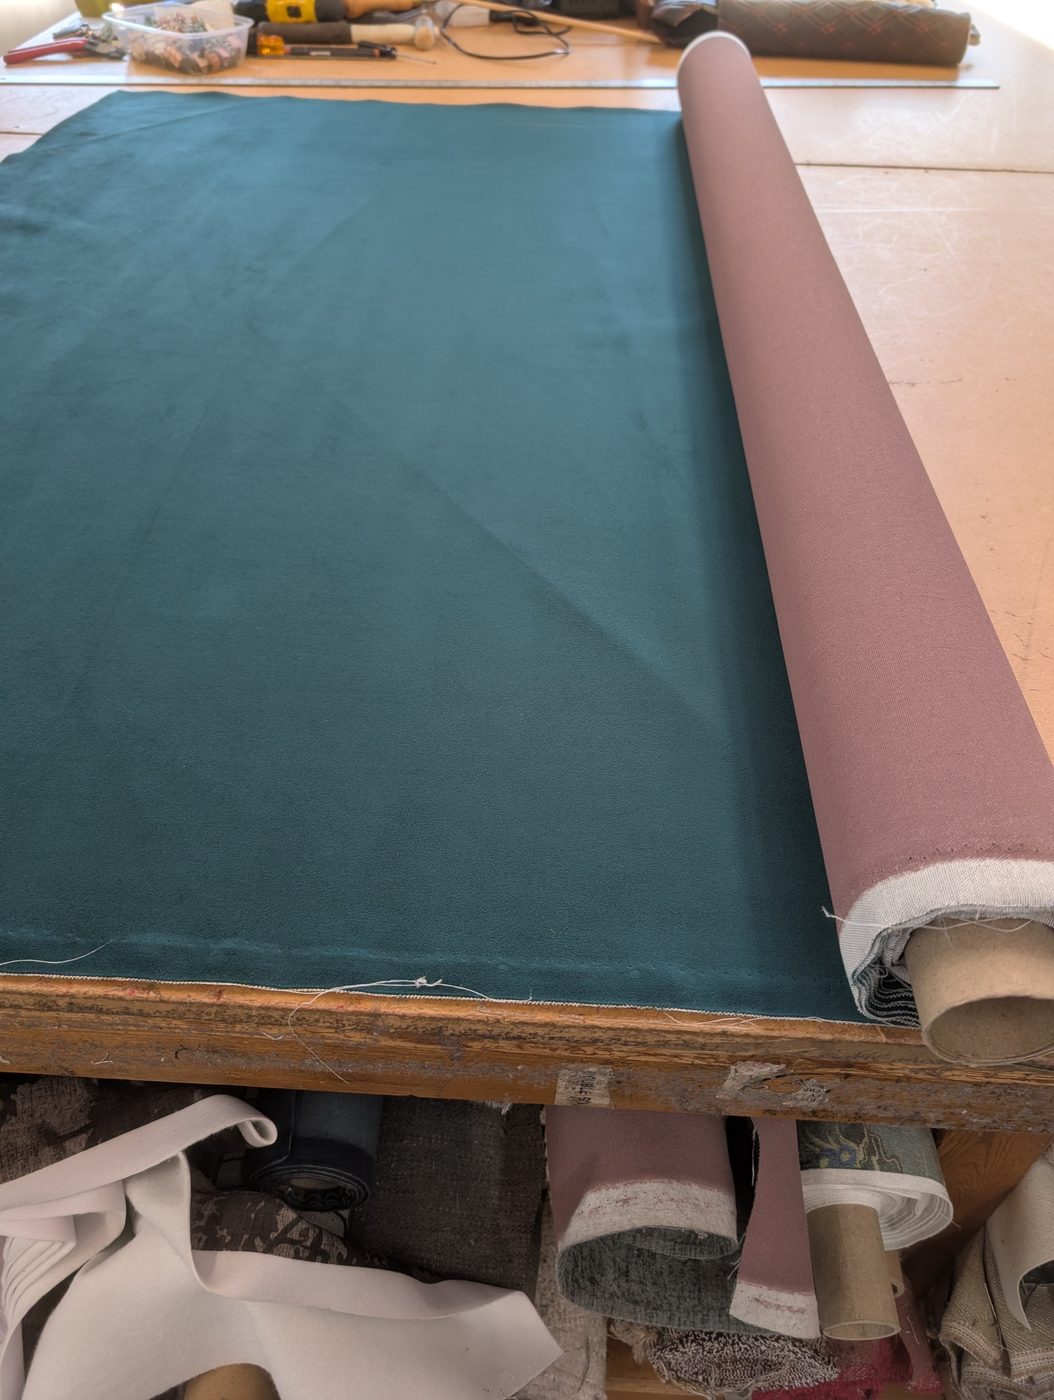
The customer's choice for this chair: a deep teal velvet. Rolled out flat on the cutting table so the panels can be marked and cut with the pile all running the same way — with velvet, getting the pile direction right across every panel is what makes the finished chair look consistent rather than patchy.
The chair as it came in
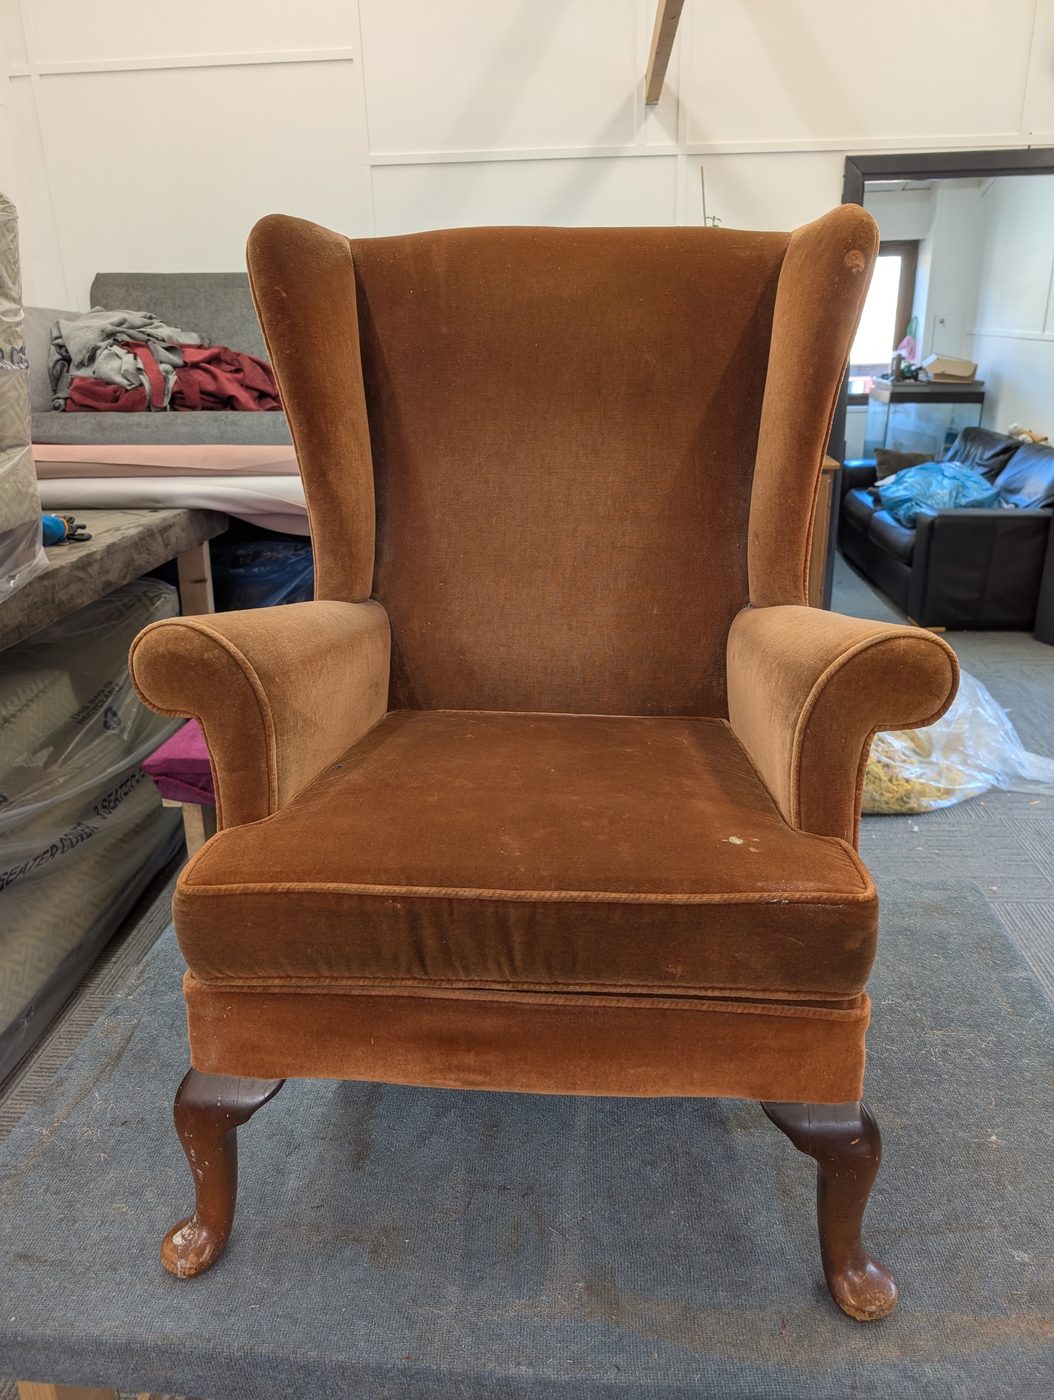
A classic Parker Knoll wing chair, worn but honest. The brown mohair had gone thin and dull across the seat and arm fronts where years of use had taken their toll, and the seat cushion had lost its lift. None of that is a problem when the frame underneath is sound — and Parker Knoll frames almost always are. This is a chair built to be re-covered, not thrown out.
A closer look at the wear
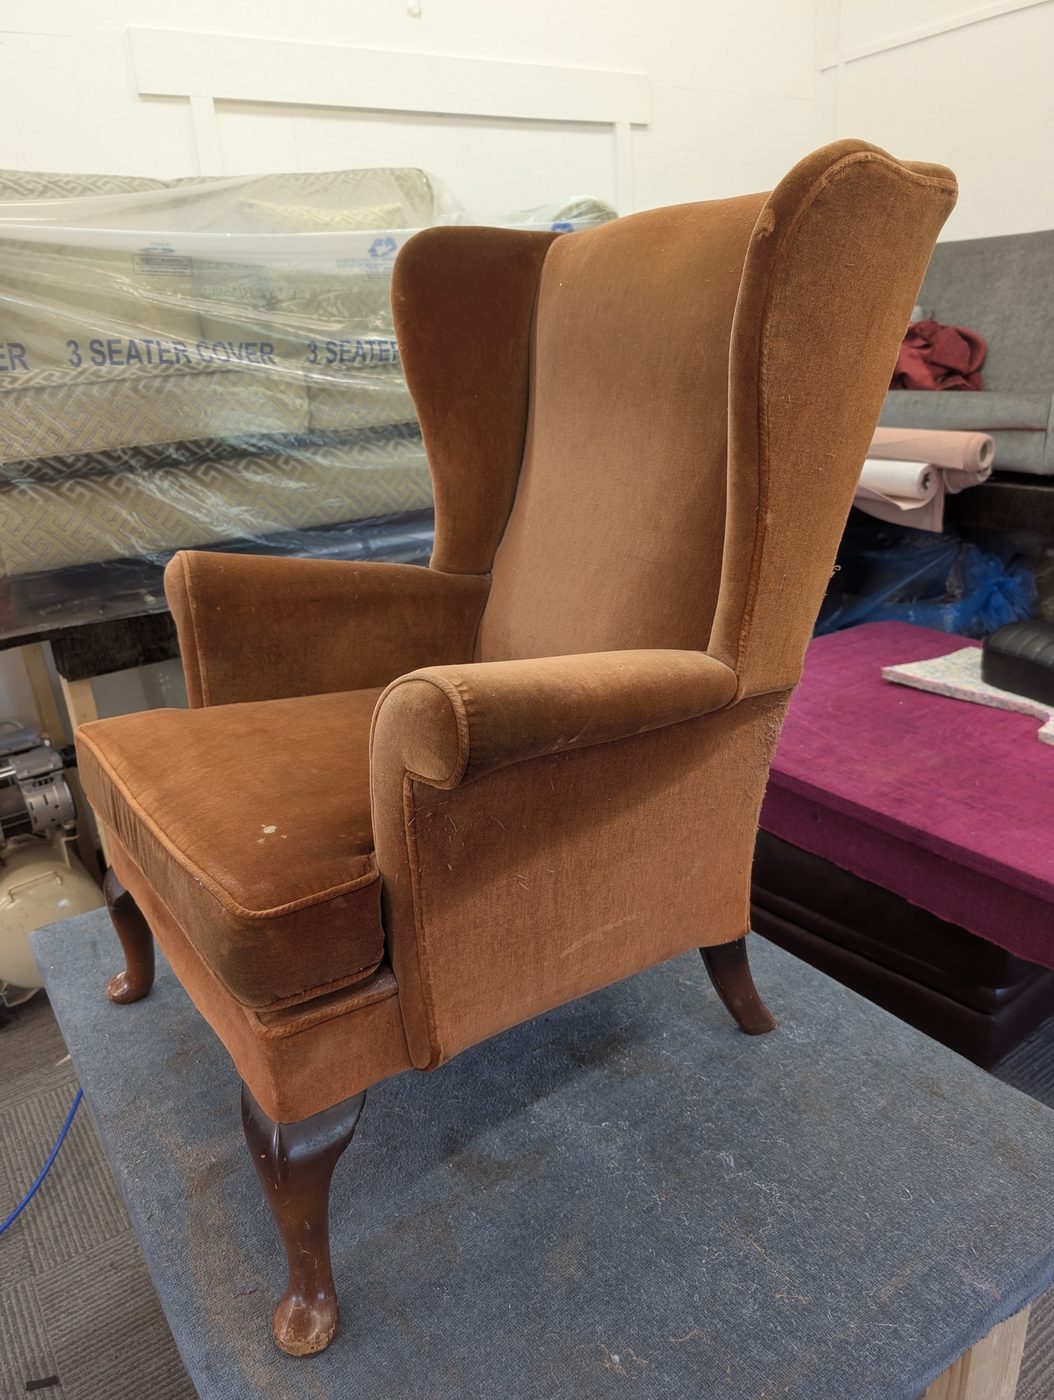
Up close you can see exactly where a chair has been lived in. The velvet pile is crushed flat along the tops of the arms and the front of the wings, where hands rest and the chair gets pulled about. The lines and proportions underneath, though, are exactly as they left the factory.
The Parker Knoll frame stamp
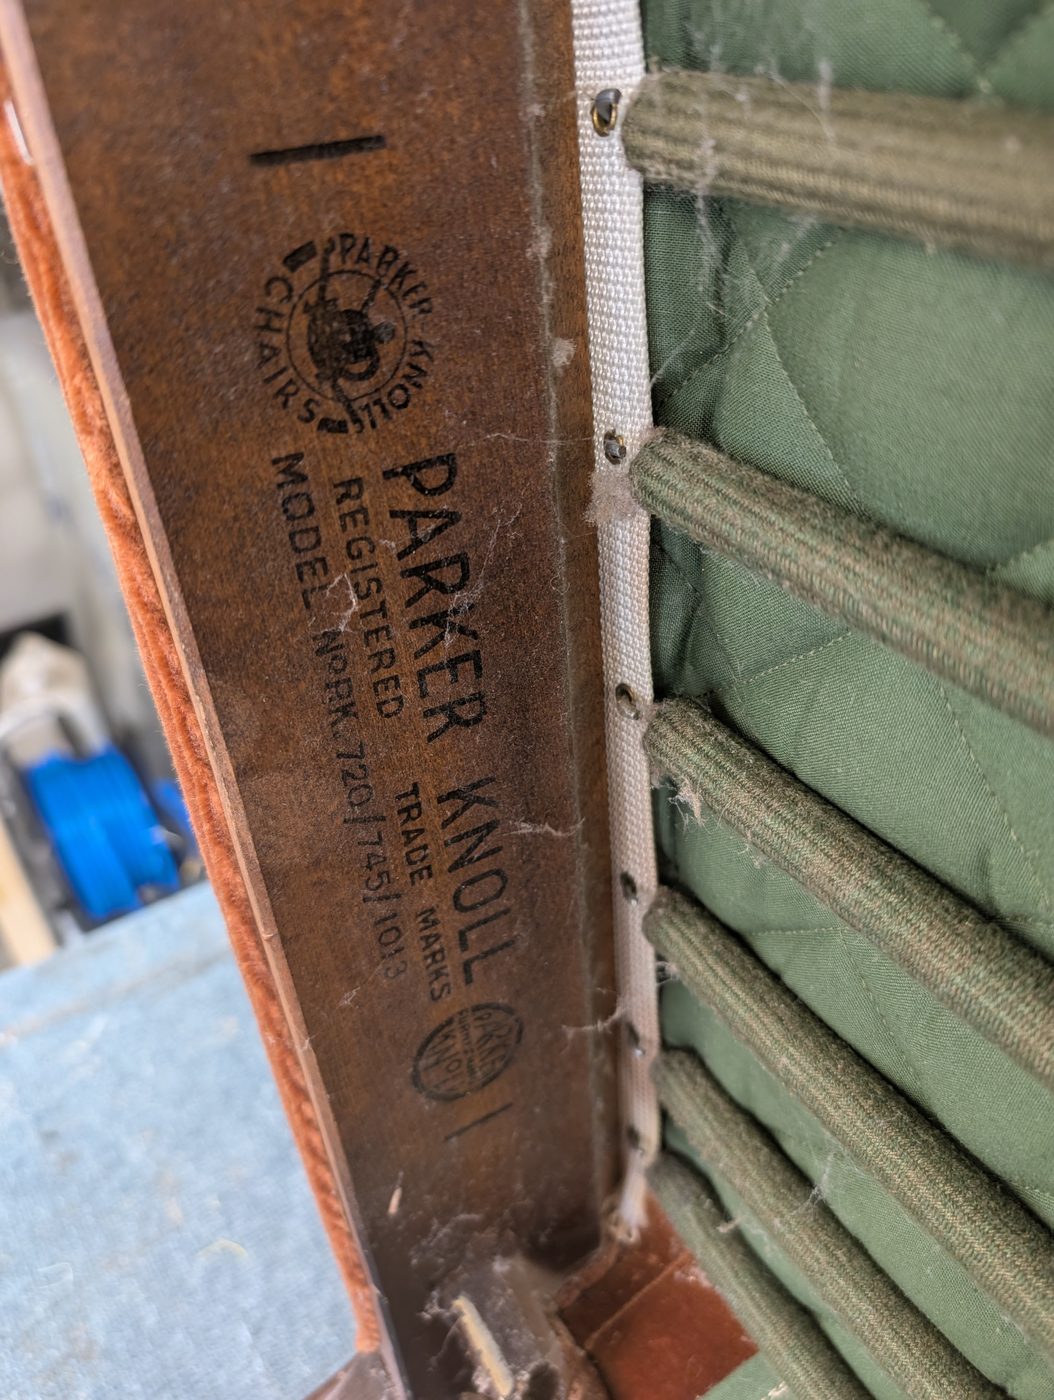
Turn a Parker Knoll over and it tells you what it is. This one carries the registered Parker Knoll stamp on the frame rail, model number PK 720/745/1013. Parker Knoll built these chairs on good hardwood frames with proper sprung seats, and checking the frame at this stage is what tells you whether a chair is a straightforward re-cover or a bigger job.
Stripping the old cover
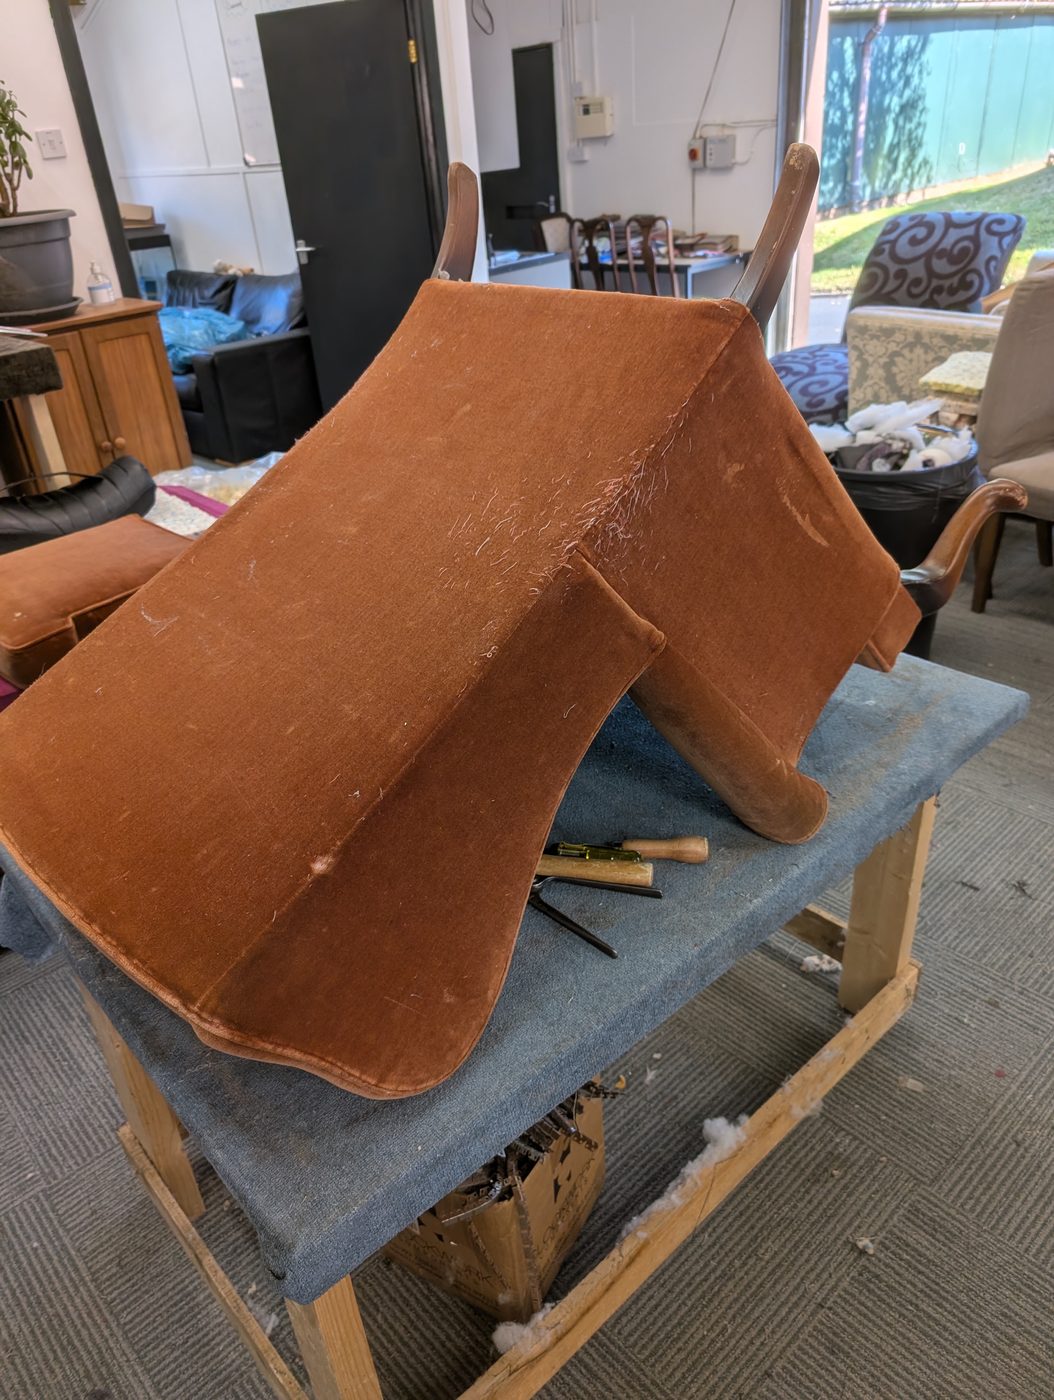
The first job is to strip the old fabric off with a staple unpicker, working panel by panel and keeping every old cover as a template for its replacement. It is careful, patient work — rush it and you damage the covers you need to copy from, or the frame underneath.
Layers coming off
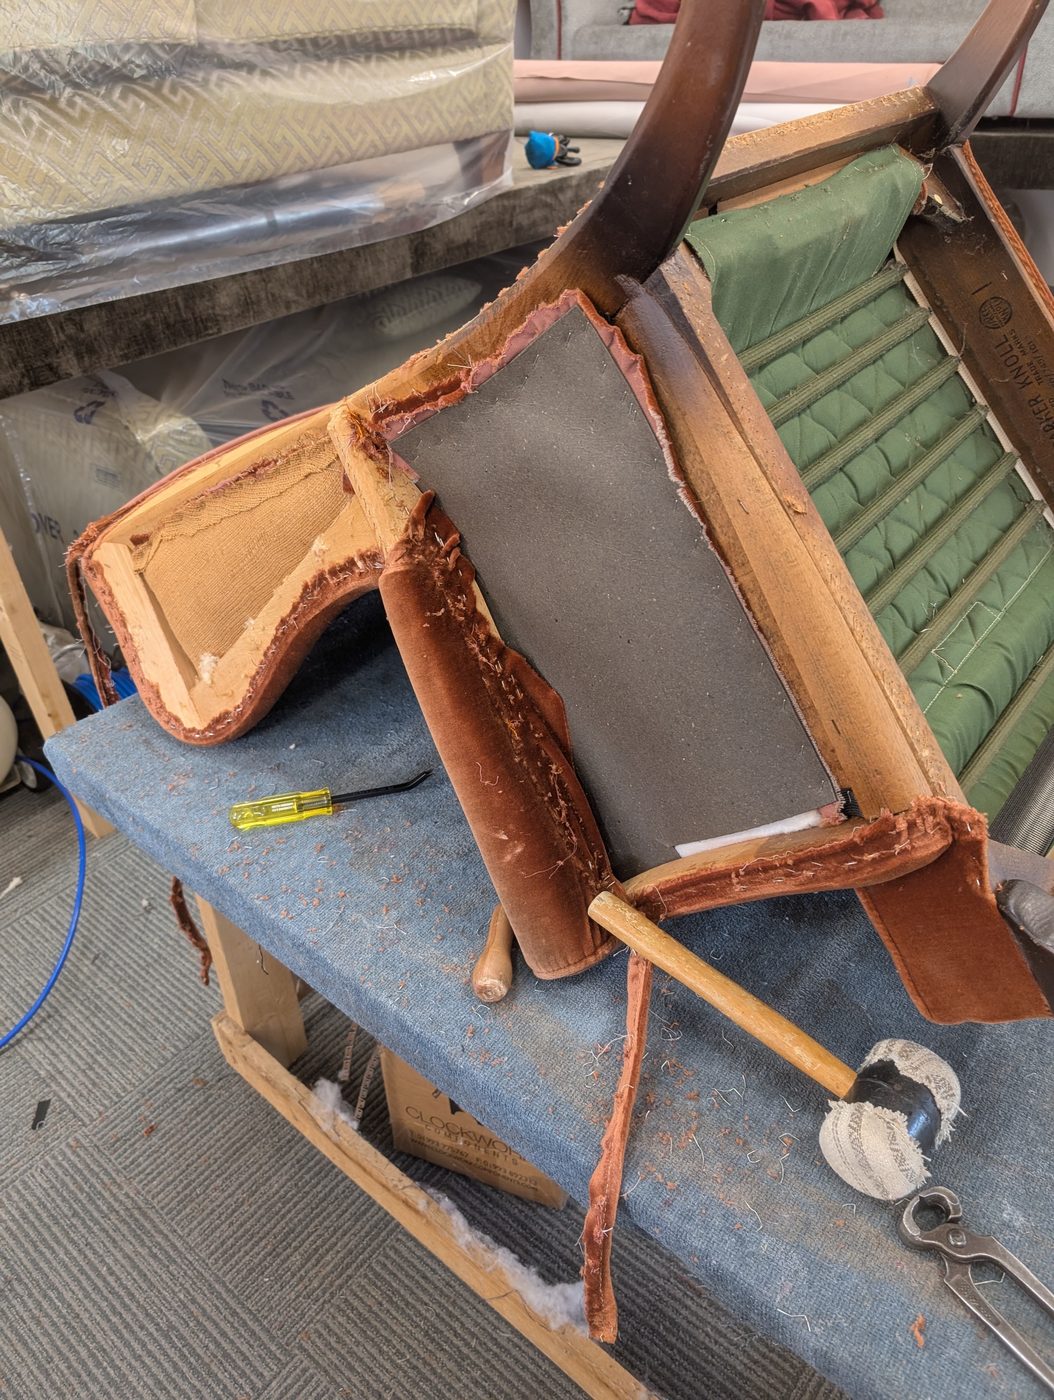
As the outer covers come away, the inner structure of the chair is revealed — the underlinings, the stuffing and the way the chair was built up in layers. Everything gets checked as it is exposed: frame joints, the original springs, the condition of the foam and wadding.
Stripped to the frame
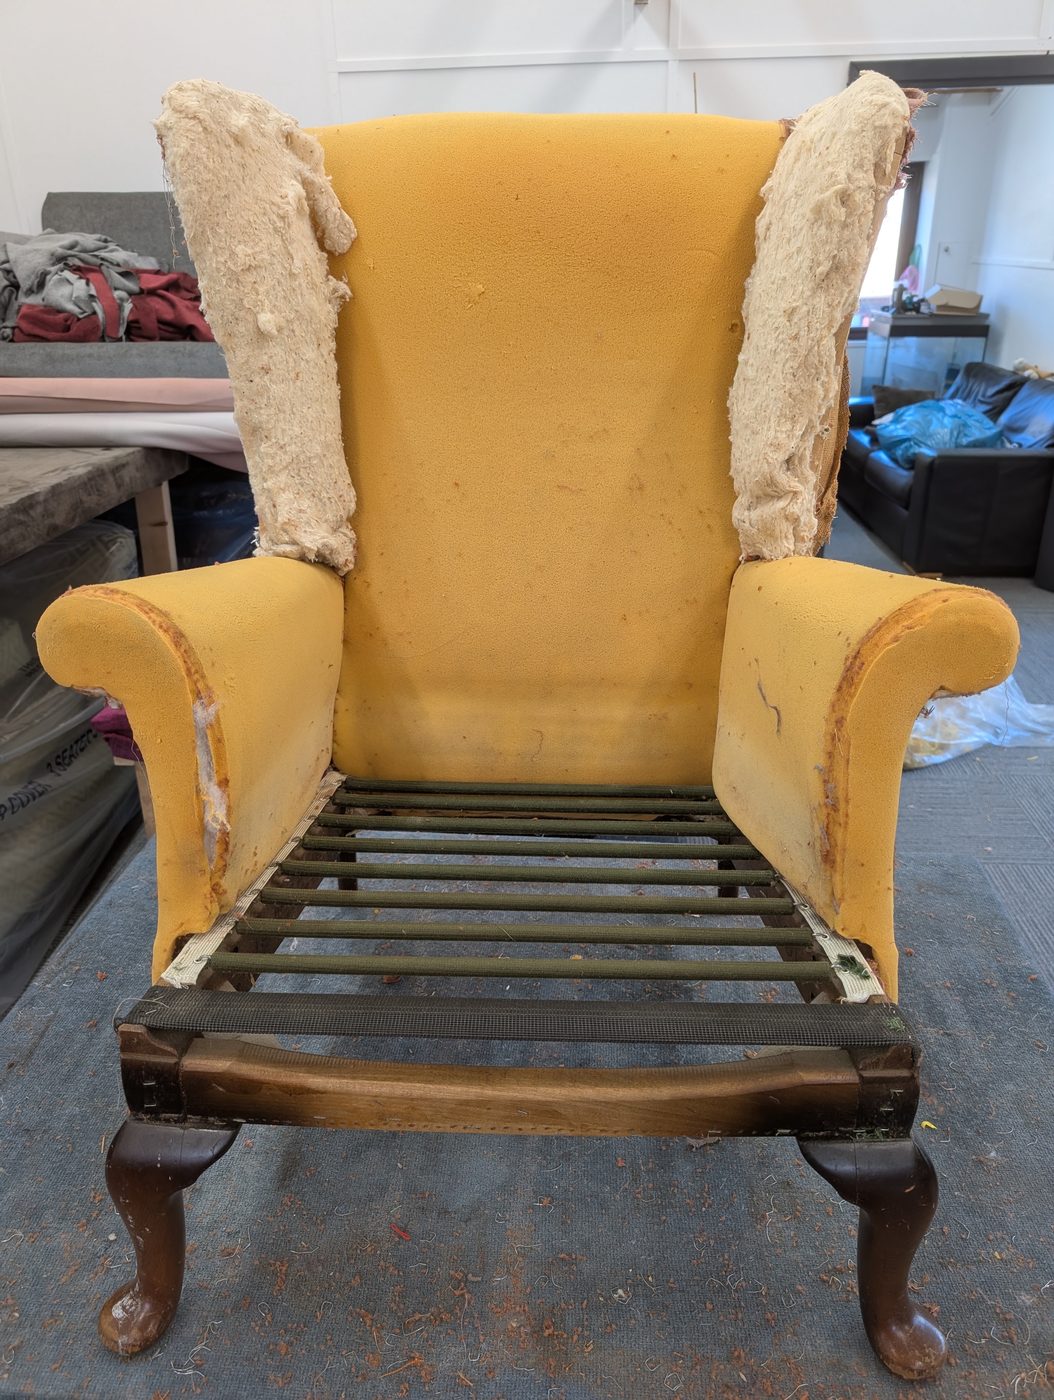
Stripped right back, the chair shows its bones: the hardwood frame, the original sprung seat, and the foam on the wings and arms. On this chair everything underneath was sound and reusable — the springs were still doing their job and the foam had plenty of life left, so there was no need to replace either. That is what keeps a job like this economical.
The first new wing
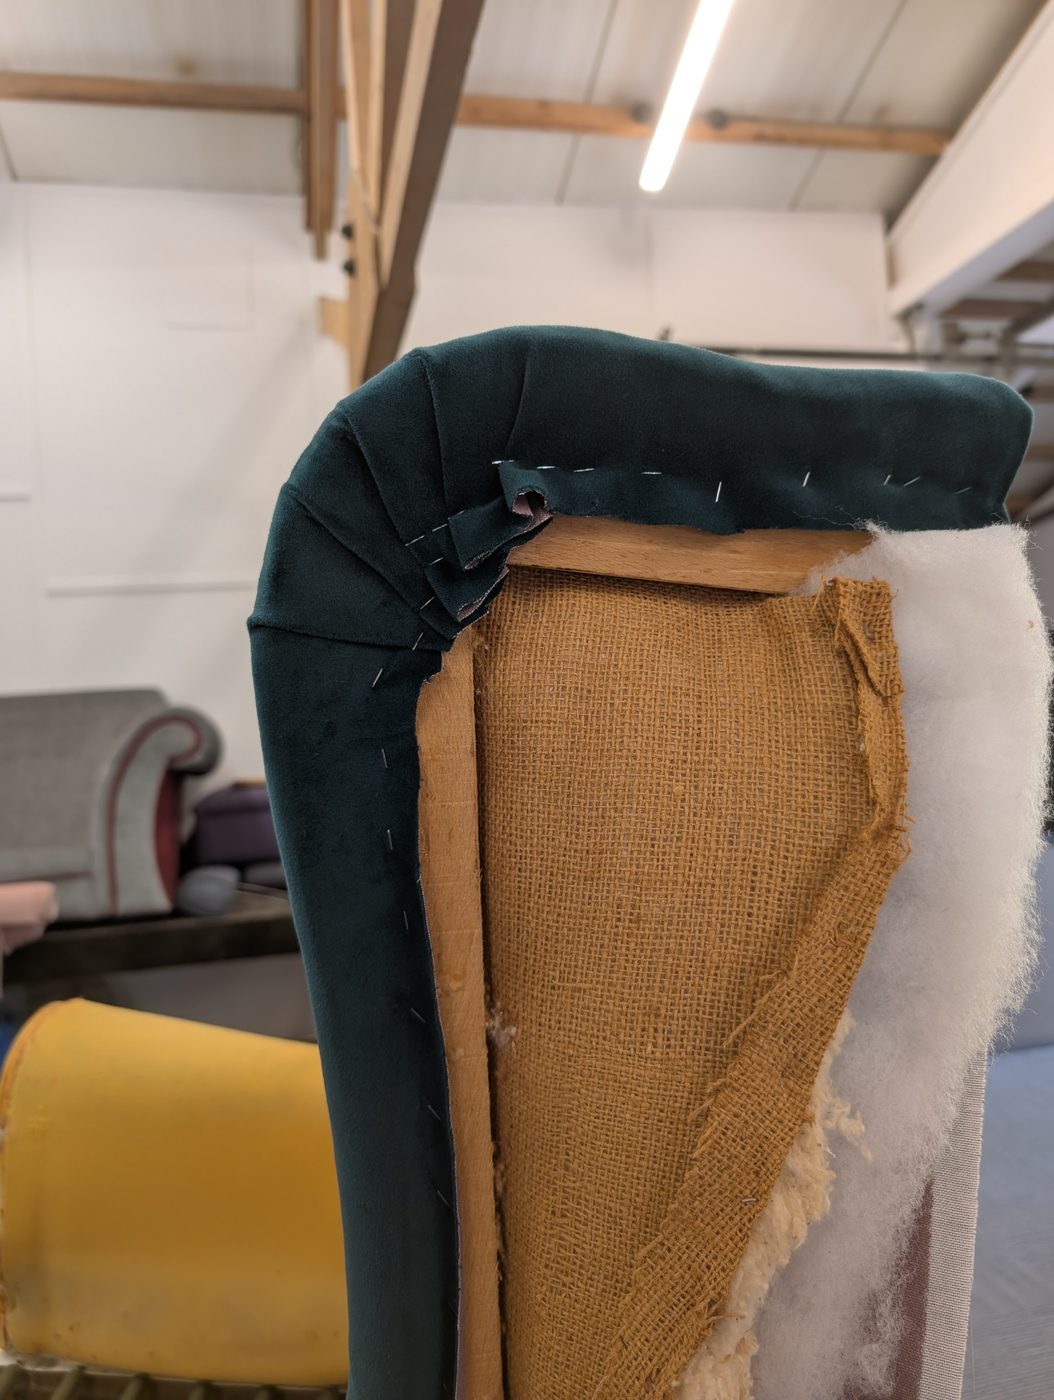
Then the re-cover proper begins, and the order matters. On a wing chair you work from the inside out: the wings first. Here is the first wing done — the new teal velvet cut, positioned so the pile runs true, and worked into the curve of the wing so it pulls in tight and clean with no wrinkles. One wing on, and the chair already starts to come back to life.
The second wing
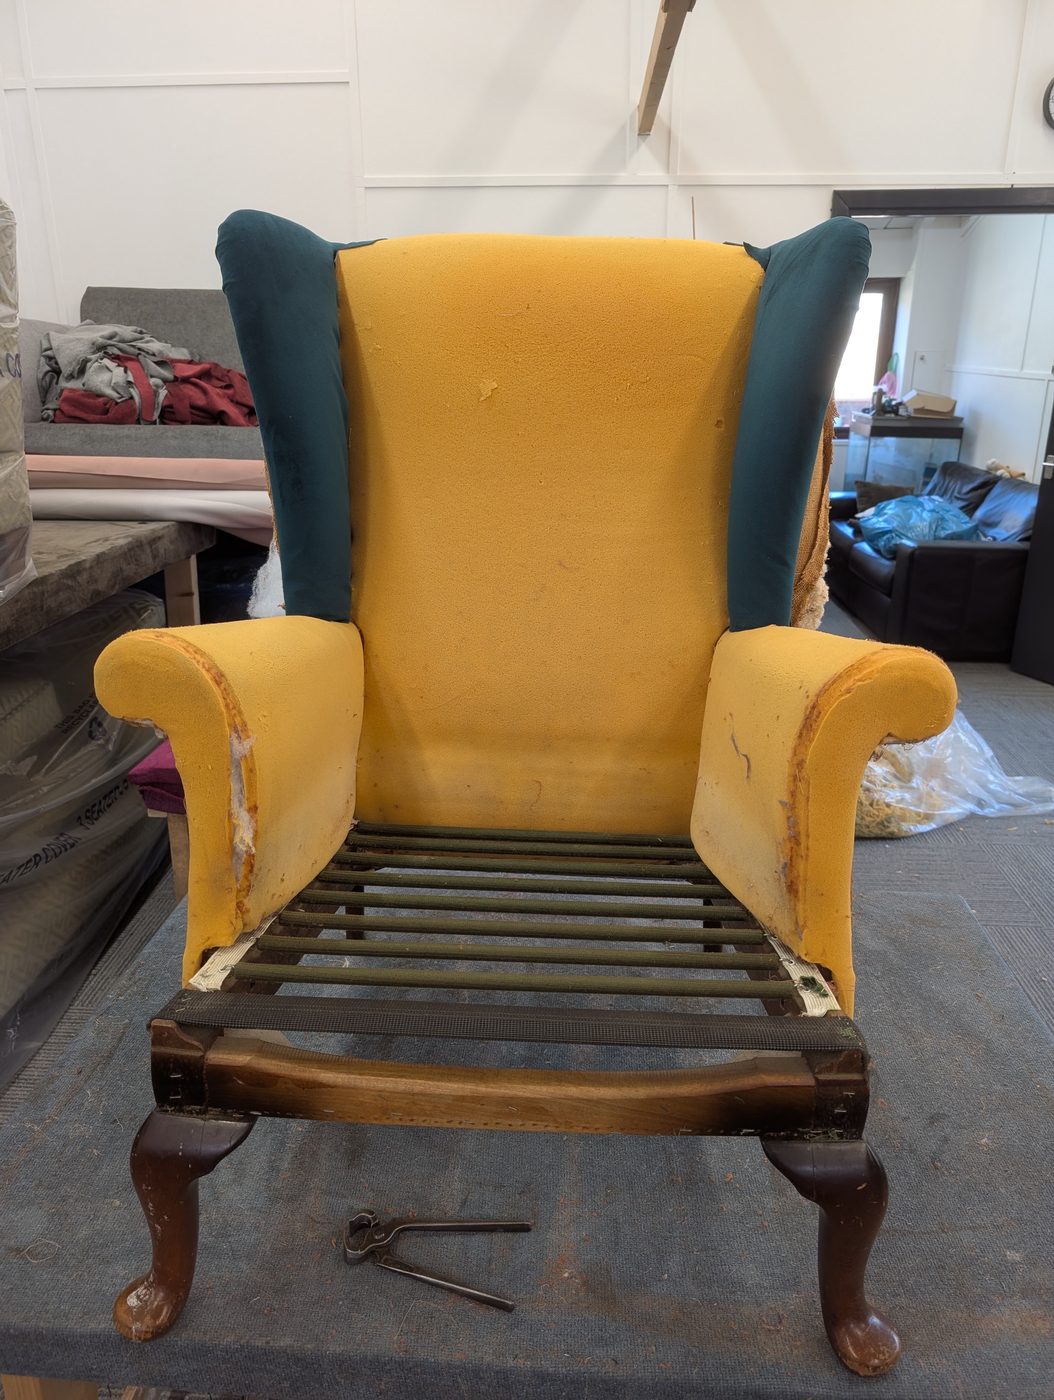
The second wing worked to match the first, the pile running the same way and the tension even across both. Getting the two wings to mirror each other is what makes the finished chair look right from the front.
The inside arms
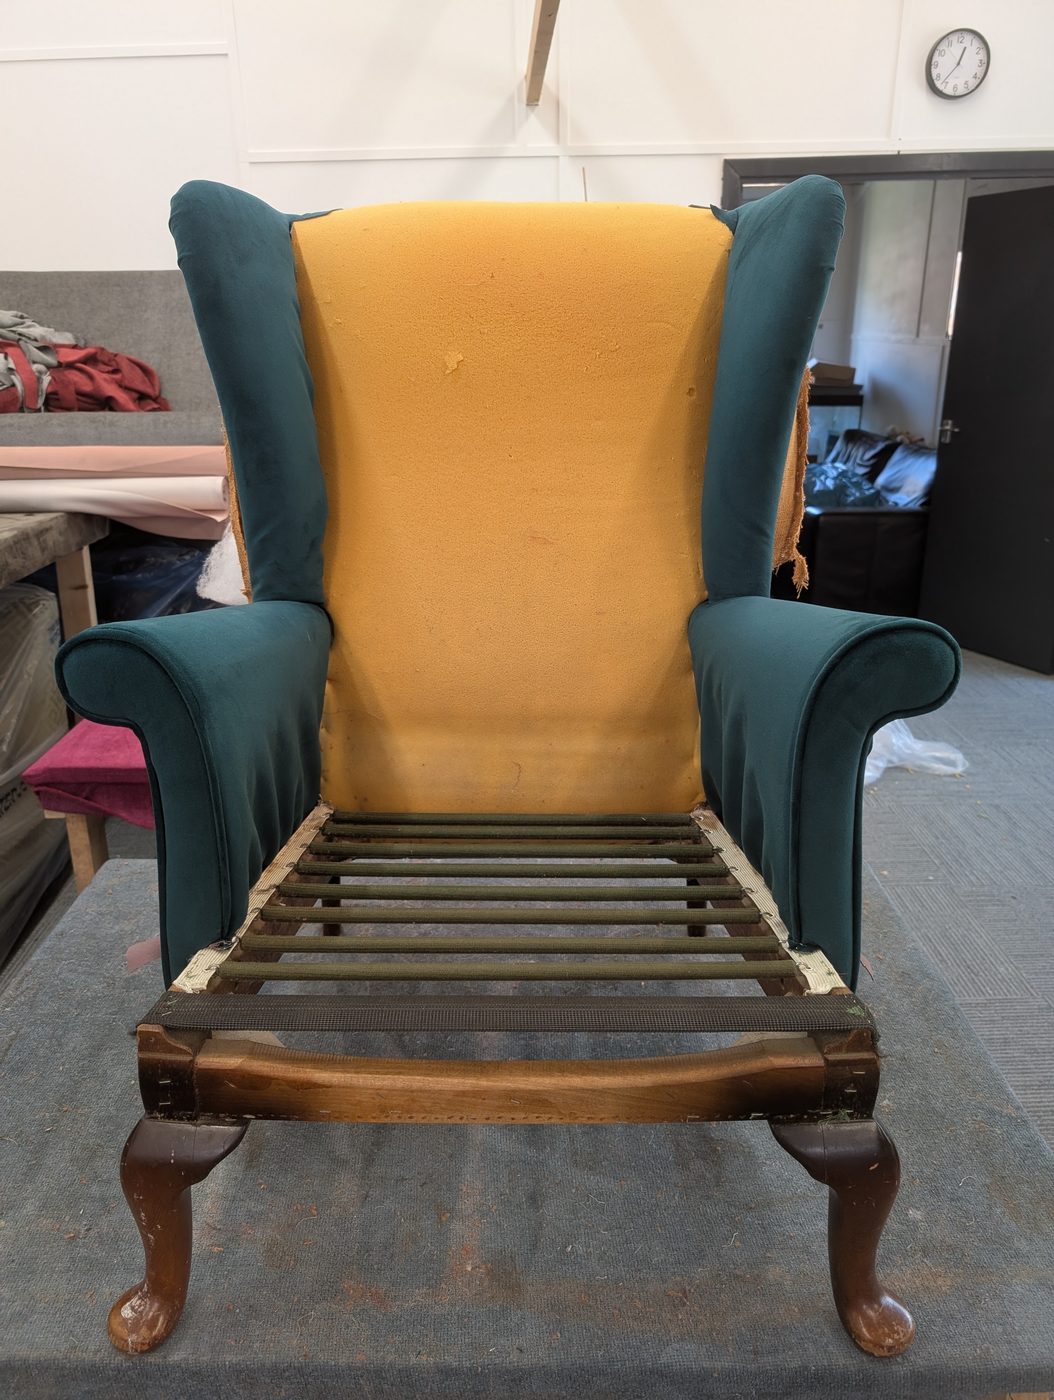
With the wings done, the inside arms go on next, the velvet worked down over the rolled arm and tucked in tight where the arm meets the seat. The sequence matters — arms after wings, so each panel laps the last cleanly.
The inside back
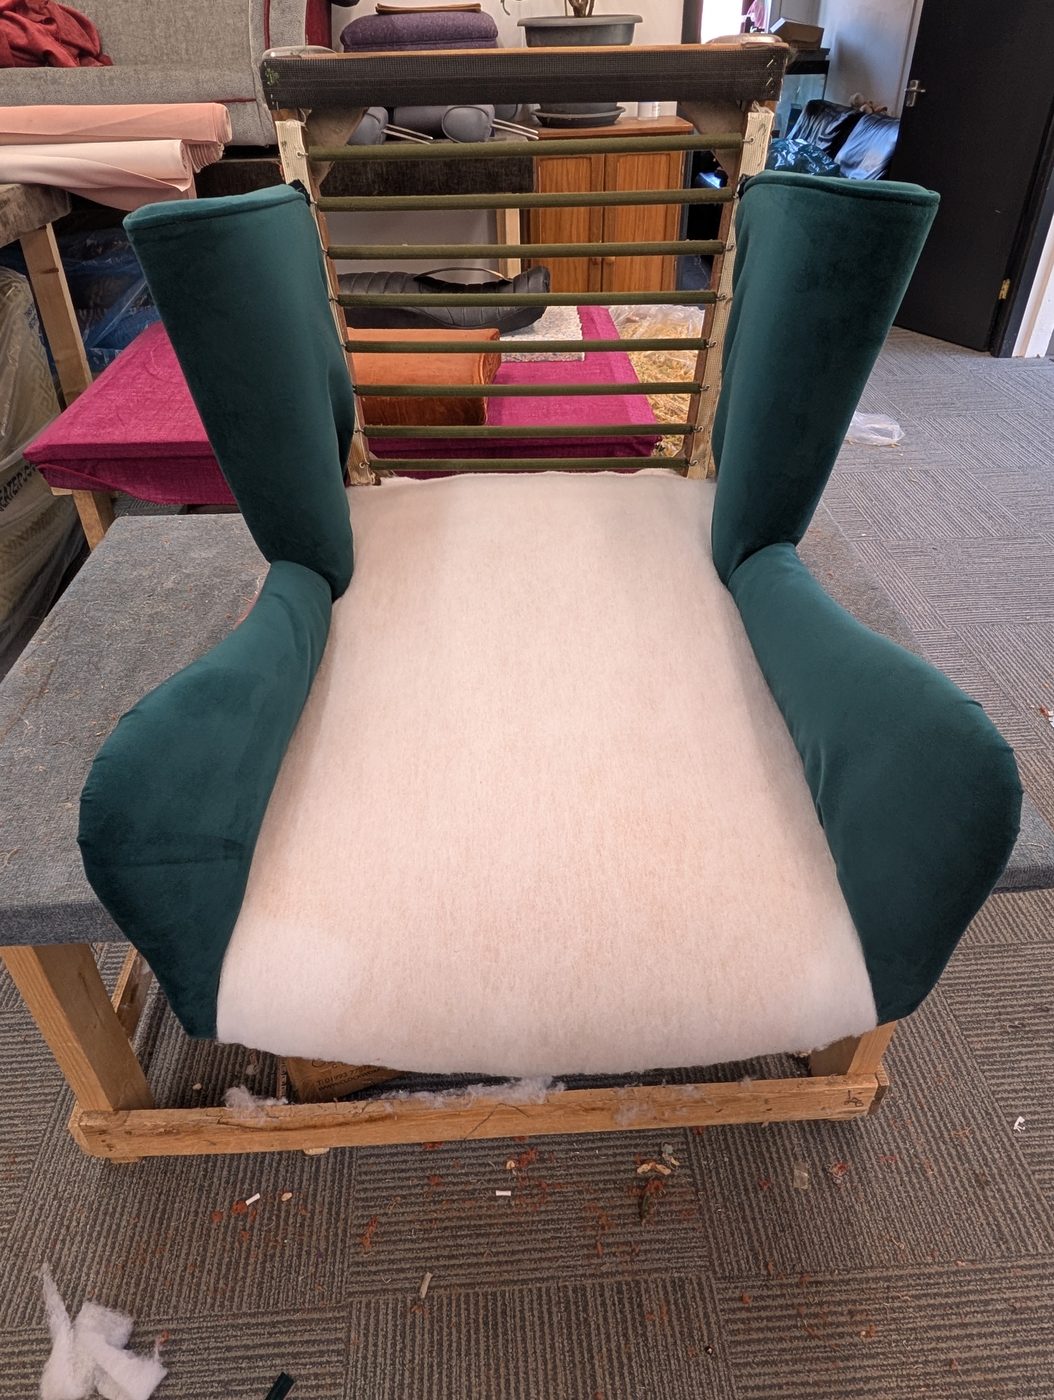
The inside back is next, pulled taut up the centre and worked out into the wings where the panels meet. This is a big panel and it has to sit smooth and square, with the pile running straight up the chair.
The inside back worked in
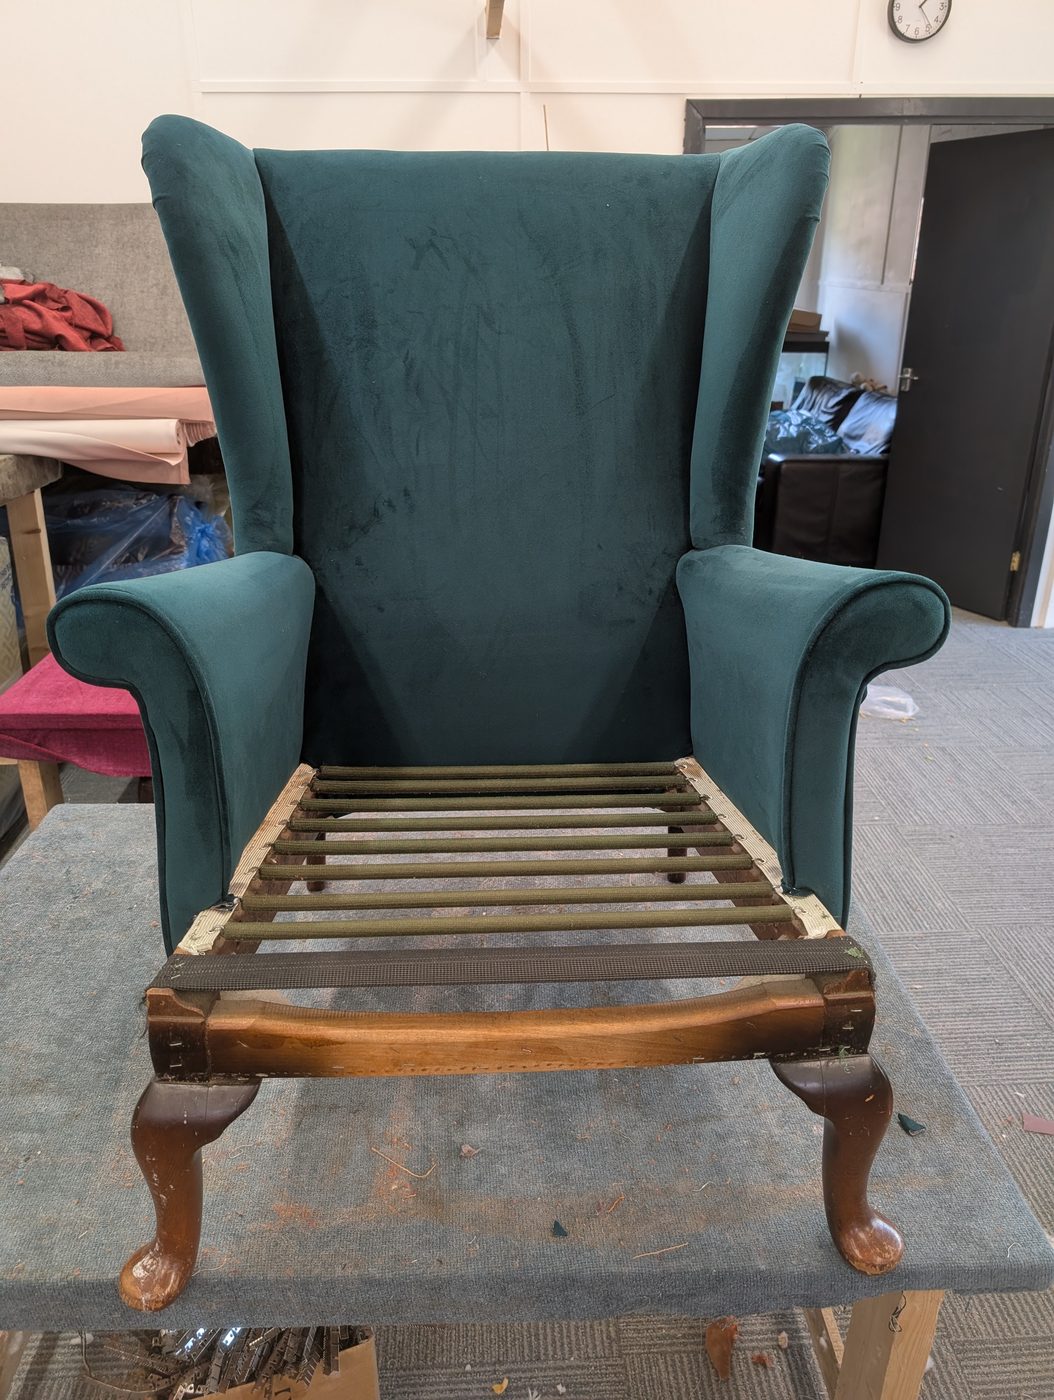
The inside back worked fully into the frame, tension held even so the velvet lies flat with no ripples. With the wings, arms and inside back on, the whole inside of the chair is now in the new teal.
Piping the wings
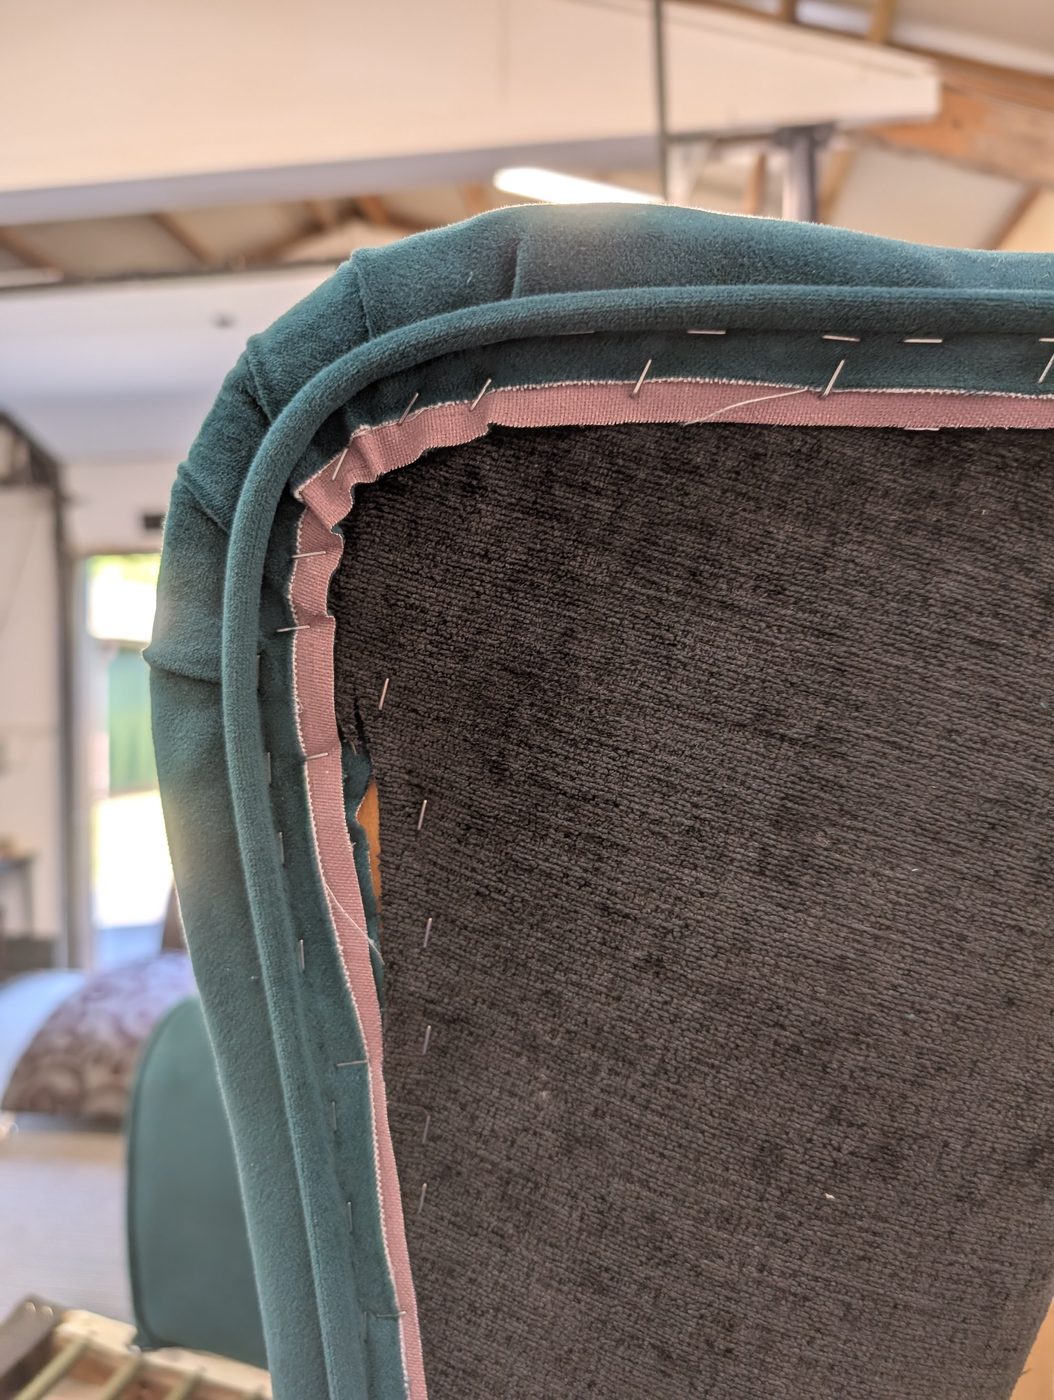
Now the piping goes on. Piping — or welt — is a cord wrapped in a strip of the same velvet, run along the seams to give a crisp, defined edge. Here it is being pinned along the wing before it is fixed, following the curve exactly. It is the detail that separates a professional finish from a soft, vague one.
A finished outside wing
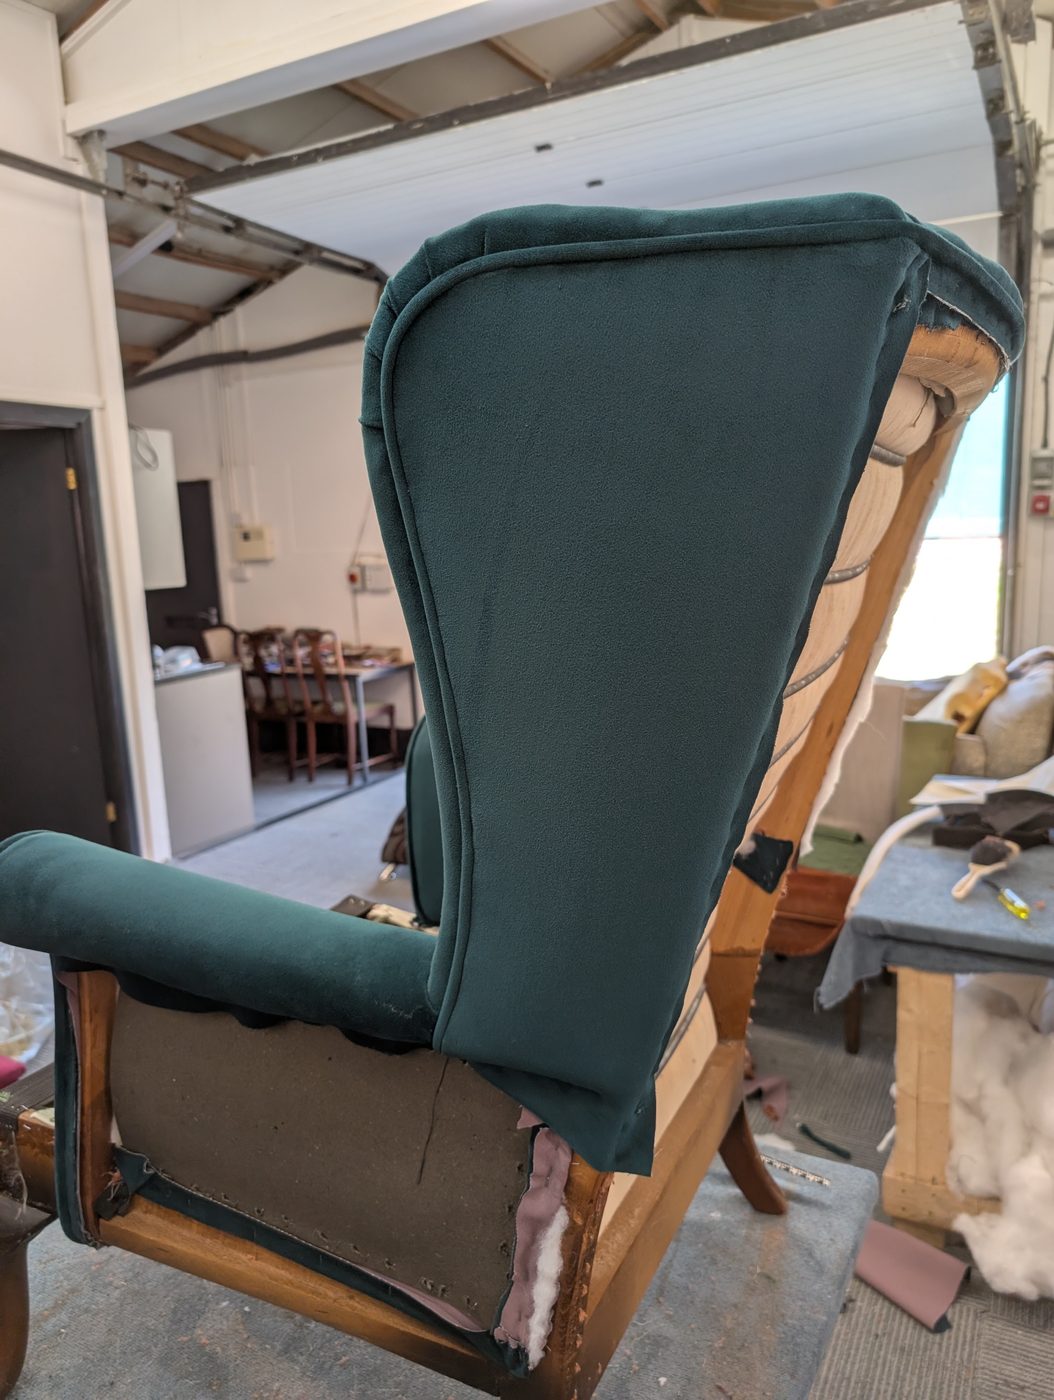
A finished outside wing: piped along its edge, the velvet pulled taut and closed in cleanly against the piping. The defined line the piping gives is what makes the wing read crisp and deliberate.
The outside arms and back
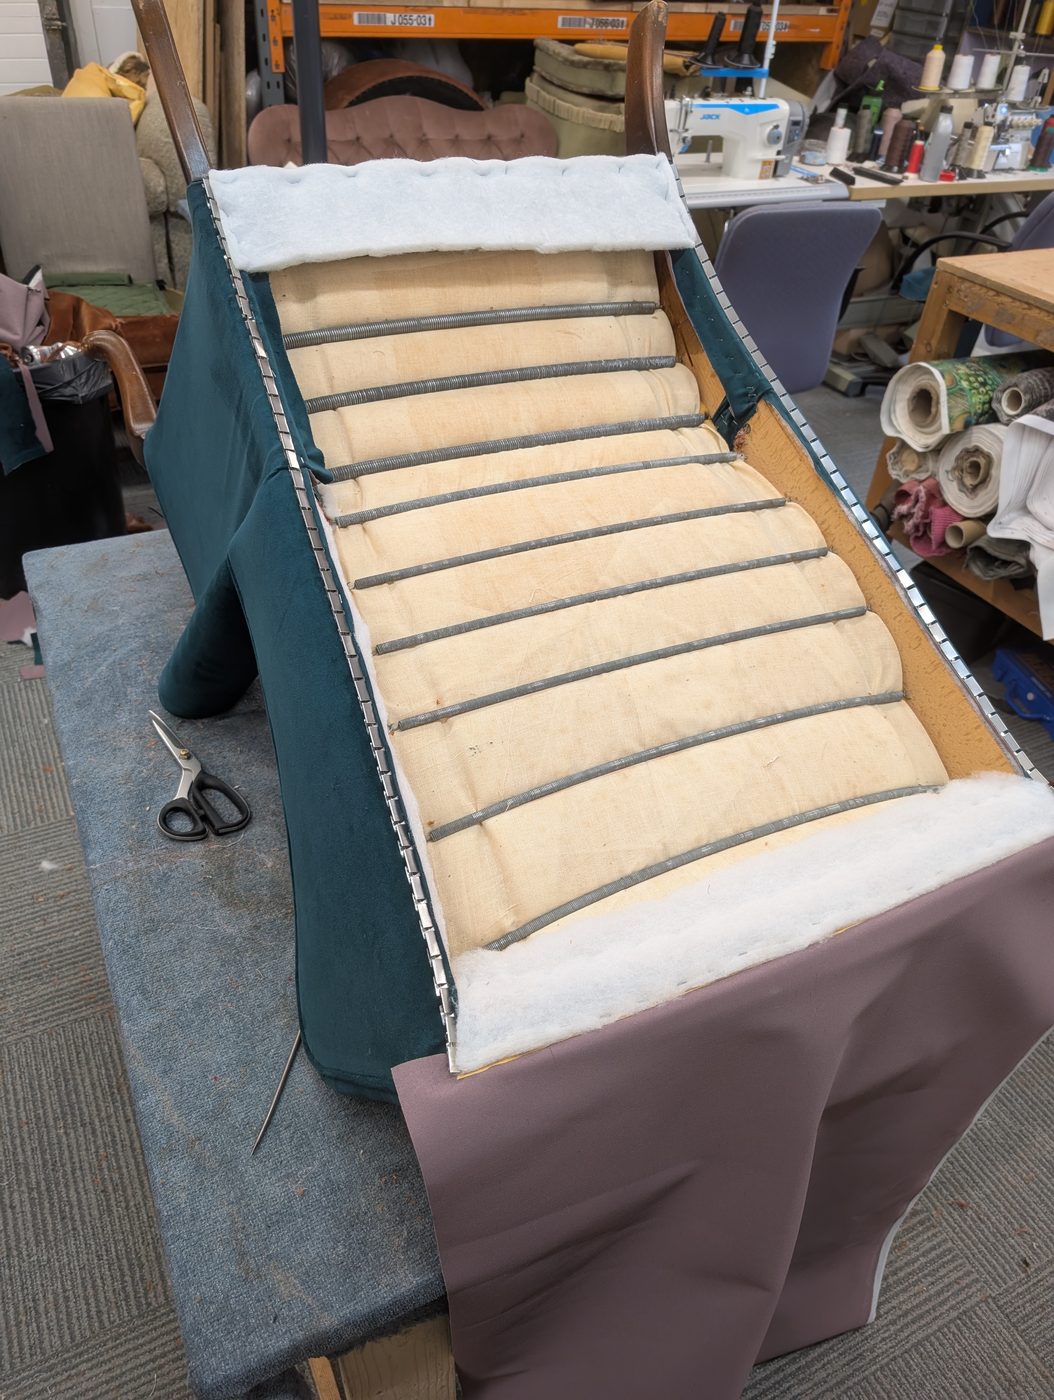
The outside arms and outside back go on last. They are back-tacked using a metal tacking strip — a thin strip fixed along the top edge that gives a dead-straight, invisible line where the outside panel folds down. It is the neatest way to close in an outside panel, and it is what gives the back of the chair its clean finish.
The cushion ready to sew
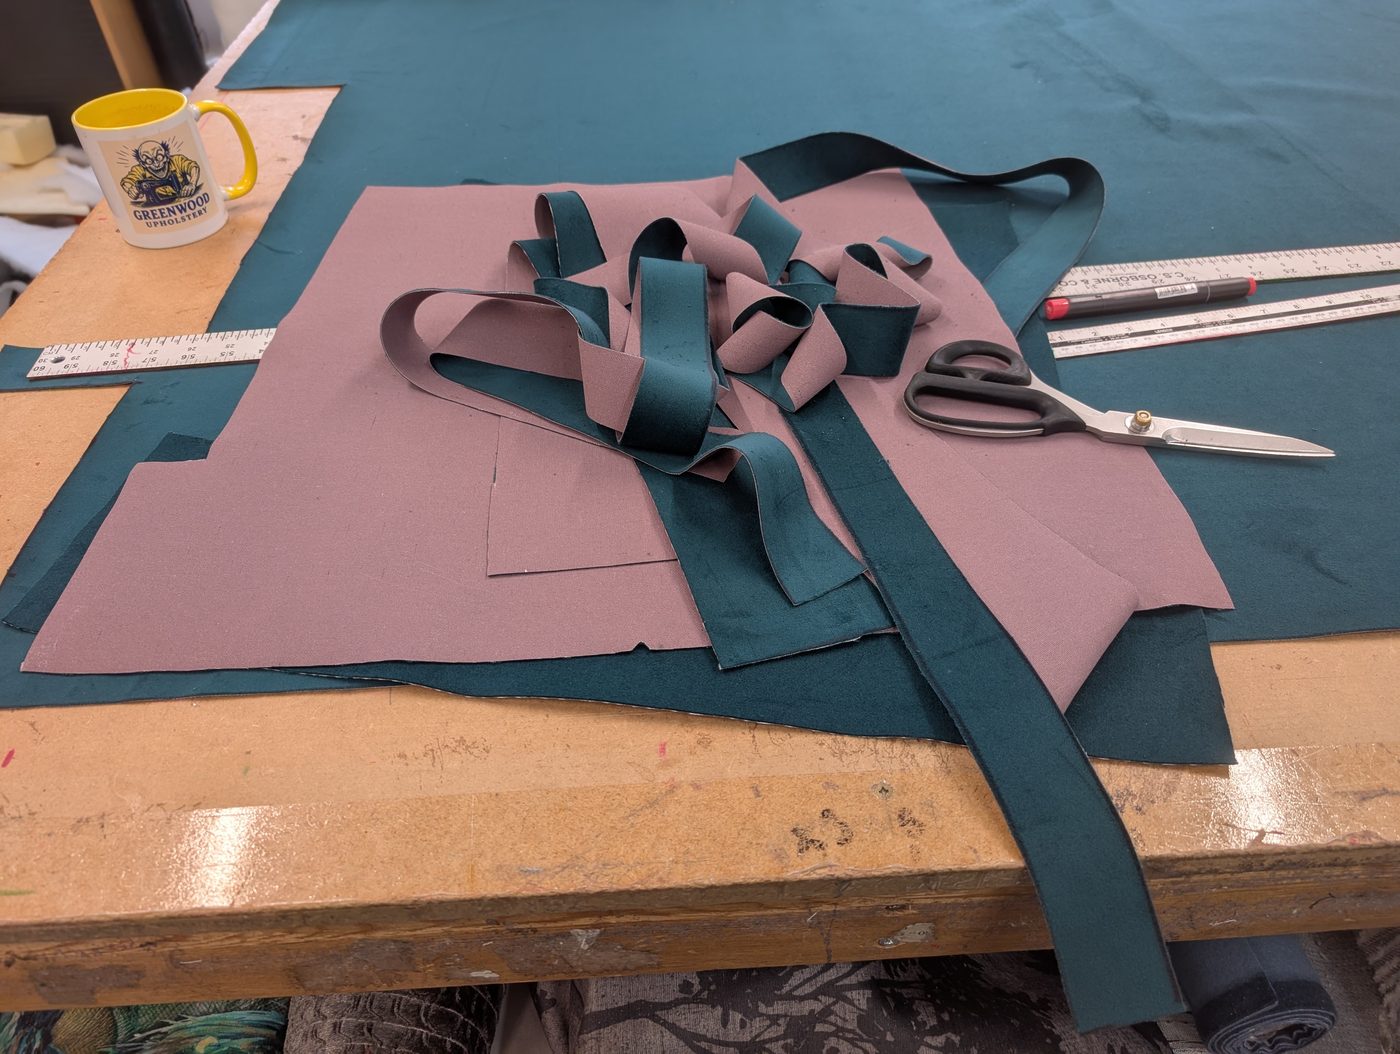
With the chair itself covered, the seat cushion is cut — top, bottom and a boxing band all the way round, with piping to match the chair, cut so the pile runs true. All ready to go under the machine and be sewn up into the finished cushion.
Finished — from the front
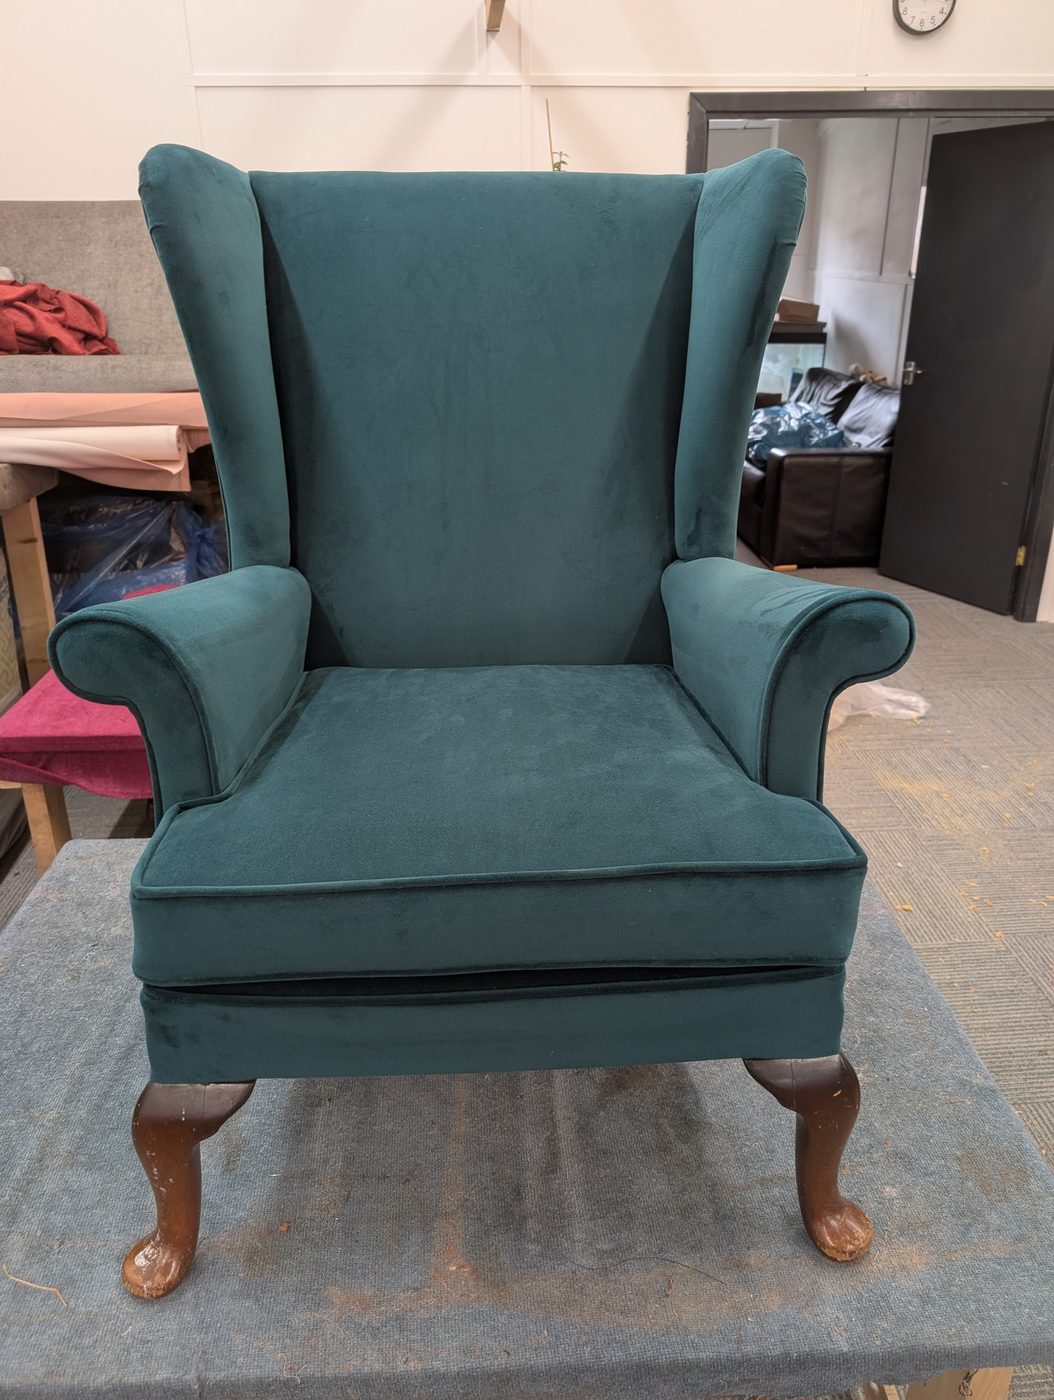
And there it is: the same Parker Knoll frame, the same good bones, reborn in a deep teal velvet. The whole job — strip, check, steam, re-cover, pipe and cushion — took five and a half hours from start to finish. A tired brown chair headed for the skip is now a piece anyone would be glad to have in the room.
Finished — from behind
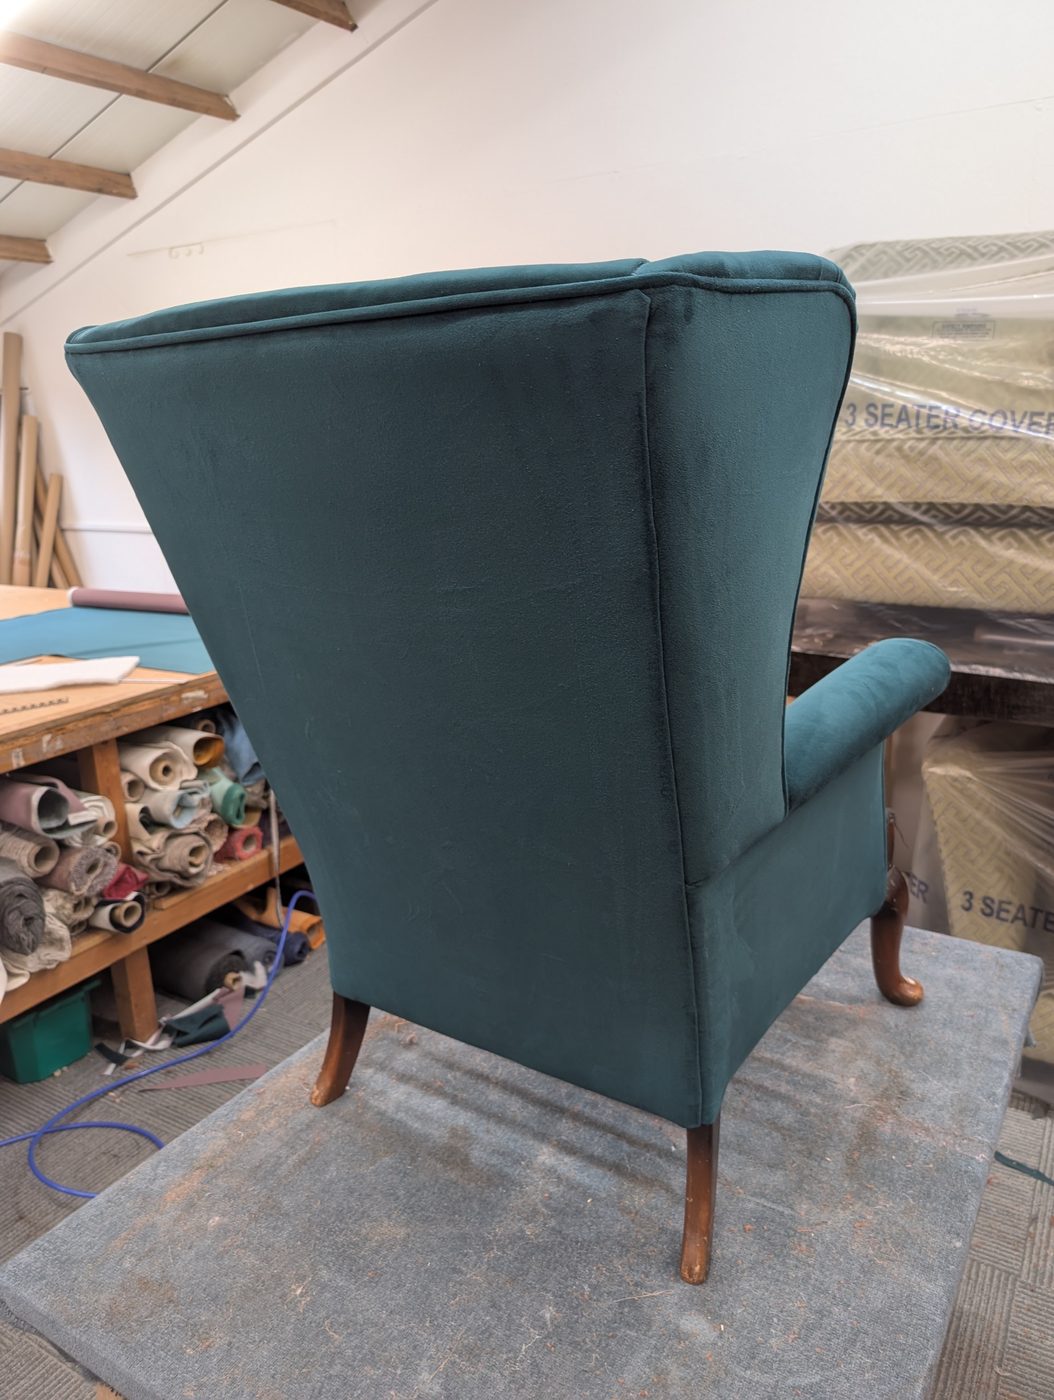
From behind, the finished chair shows the outside back and wings pulled clean and taut, the piping running true along every edge. The back of a chair is often where corners get cut — but it is the first thing you see when a chair sits against a wall, so it gets the same care as the front.
The finishing touch
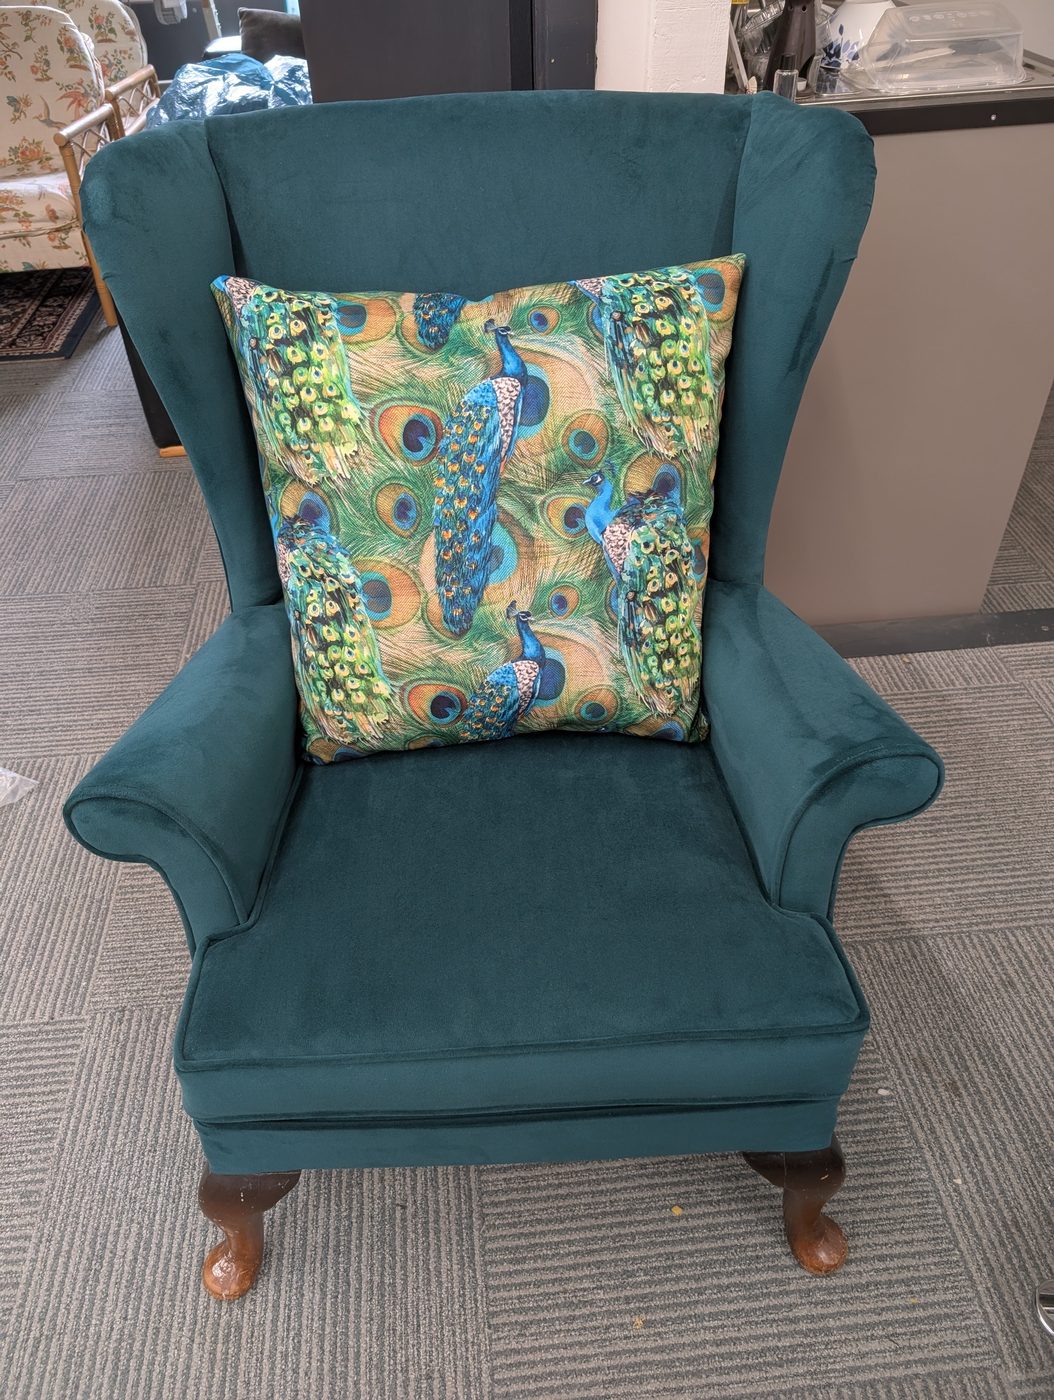
Every re-cover leaves us with offcuts, and rather than waste good fabric we make a free scatter cushion to go with the chair. This one got a peacock print that picks up the teal and the blues perfectly. It is a small thing, but it is the kind of finish that makes a customer smile when they collect their chair — the same Parker Knoll they brought in, given another lifetime.
The methods behind this job
Every technique used here is set out in full in the book:
- The Wing-Back Armchair
- Stripping the Old Work
- Foam Construction
- Stuffing and Stitched Edges
- Work out your own fabric
- Estimate a job like this
Questions about this job
How much does it cost to reupholster a Parker Knoll wing chair?
The labour on a straightforward Parker Knoll wing chair re-cover like this one is around five and a half hours, plus fabric and materials. The exact cost depends on the fabric you choose and whether the frame, springs and foam can be reused — on this chair they could, which keeps it economical. Use our reupholstery cost estimator for a guide, and we are always happy to give a proper quote from a photograph.
Are old Parker Knoll chairs worth reupholstering?
Almost always, yes. Parker Knoll built their frames from good hardwood over proper sprung seats that last for decades — this one's original springs were still sound. When the frame, springs and foam are all in good order, a re-cover gives you a better chair than most new ones, at a fraction of the cost of replacing it with the same quality.
Can the original springs and foam be reused?
On this chair, both were reused. The original seat springs were still sound and tensioned, so they stayed. The foam had compressed over the years but was structurally fine, so rather than replace it we steamed it — which relaxes the compression and brings it back up to shape. A fresh layer of Dacron over the top gives the smooth, full finish. Reusing sound materials is better for the chair and better for your wallet.
How long does it take to reupholster a wing chair?
This one took five and a half hours from start to finish — stripping the old cover with a staple unpicker, checking the springs and steaming the foam, re-covering the wings, arms and back in order, adding the matching piping, back-tacking the outside panels, and sewing the cushion. A chair with frame damage or one needing full traditional re-webbing and stuffing would take longer, but a sound chair being re-covered in a plain fabric is a single day's work.